 Loading ...
3D printed crowns in 1 hour – a guided workflow by prof. nulty
This is a step-by-step guide to a 1-hour 3D printed crown workflow with Prof. Nulty. Learn how to move from scanning to finishing in 7 steps. A discussion about the IDDA, an educational platform for digital dental professionals around the world, will also be included.
Last month, we sat down with Professor Adam Nulty, President of the educational platform International Digital Dental Academy and an award winning esthetic dentist, for a webinar about integrating a 1-hour 3D crown printing workflow into a clinical setting. From design to post-print finishing, Prof. Nulty shared an in-depth view into how new technologies have transformed the most essential applications - crowns and bridges. To ensure that each print is successful, follow this Step-by-Step Guide by Prof. Nulty.
Step 1: Intra-Oral Scanner (5 minutes)
The first step in a digital workflow for 3D printed crowns is to take a scan of the patient’s mouth. Use an intraoral scanner to get a picture of their upper arch, lower arch, and bite. Scan each area, and ensure that there are no black spots where necessary data are missing. A complete picture of the patient’s mouth will ensure the best results for designing and printing a crown.

A traditional workflow includes mixing dental putty, putting it in a tray, placing that tray correctly into the patient’s mouth and then waiting for it to settle properly. This can be time-consuming and sometimes inaccurate. Using an intraoral scanner allows for a much more accurate image of the patient’s mouth, and can be completed in under 5 minutes.
To learn more about transitioning to an intraoral scanner, refer to ScanClub, a study club founded by Prof. Nulty and his colleagues: https://scanclub.co.uk/
Step 2: Choose Your Printing Material
Many high-quality crown and bridge materials are available on the market, for both temporary and permanent restorations. Material strength, stainability and color stability after curing must all be taken into consideration when selecting a resin. The recommended choice for temporary crowns is the CURO Crown. With a flexural strength of 90 mpa, it is highly durable and yields fast results with the SOL and the small build platforms.
For permanent restorations, Prof. Nulty used the BEGO VarseoSmile Crown plus – a resin with very low water absorption (<10 μg/mm3) and water solubility (<1 μg/mm3), excellent stability at 116-150MPa**, and attractive aesthetic properties.
“With an open system, your options are much more versatile, you’re not tied down to one resin manufacturer. But since Ackuretta does the calibration and validation process, there’s also no trial and error process for the clinician. It really makes all the difference to me.”
– Professor Nulty, on why he chooses Ackuretta
Ackuretta’s open system allows for more than 150 resins to be used, so that dentists are able to choose from a wide variety of resins, based on their needs. Dental professionals such as Prof. Nulty appreciate the flexibility of this versatile, calibrated and validated system.
Step 3: CAD Design (15 minutes)
The design of the crown can be done in-house or outsourced. Physicians may choose to design a crown themselves, while others wish to save valuable time by outsourcing the design – a service solution which is offered by organizations such as Evident and designers like Seth Potter.
Ackuretta’s printing solution is compatible with a wide variety of CAD softwares. This allows for enhanced accuracy and precision of prints – during the design process, the printer parameters are known, which can then be applied to the application.
Once the design has been finalized in CAD software (in-house or via an outside source), the STL file can be imported directly into CAM slicing software.
Step 4: Slicing Software or CAM Software (3 minutes)

Once the design has been finalized in CAD software (in-house or via an outside source), the STL file can be imported directly into CAM slicing software.
Prof. Nulty uses Ackuretta, which means his slicing is done through Alpha 3D. He is able to adjust the printer, resin, build platform settings and supports, and then send that file directly (through wifi) to his printer. This slicing software is designed to be user-friendly, and has various AI functions . The most advanced version of the software, Alpha AI, will be launched later this year – and will contain even more AI tools, making it possible to have a design ready for printing in just a few clicks, and with a significant reduction in failures by eliminating human error.
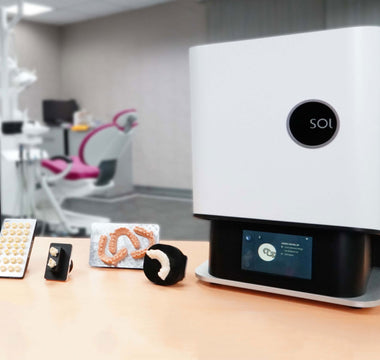
Step 5: Print (15 minutes)
To print, first ensure that the resin has been mixed well, and that there is enough resin in the vat. Start by shaking the bottle for 1-2 minutes, and then pour carefully into the vat. If it appears not mixed enough, take a business card and mix the resin until it becomes consistent. Make sure that enough resin is in the vat for your desired print. 100ml is the recommended minimum amount, and the maximum amount of resin poured into the vat must not exceed 300ml.

Once the resin is in the vat, place the vat into the printer, and attach the build platform securely to the printer. Ensure that the correct file is in the Queue, and then press PRINT. If more than one crown is being printed on the same build platform, it will still be the same printing time, because of LCD printer technology. Small and medium build platforms, which can print up to 60% faster, can additionally decrease printing time.
Step 6: Post-Printing – Wash + Cure (two 5-minute washes + 10 minutes)

The next step in the printing process is cleaning and curing. The print must be cleaned of excess resin with either isopropyl alcohol or ethyl alcohol. A double wash cycle must be done to ensure that all excess resin has been removed – first a dirty wash, which will remove up to 90% of excess resin; the second clean wash will ensure that any additional resin is removed, and will ensure a successful curing process.
NOTE: BEGO’s VarseoSmile Crown plus has specific instructions. Please refer to the instructions for use provided by BEGO.
After completion of the second wash, the print must be dried prior to curing – this can be done with an air blower. To cure the print, place it in a curing oven, then cure for the correct amount of time, ensuring biocompatibility and safety for the patient. The CURIE is pre-loaded with a materials library that allows for easy selection of the resin used, and automatic curing time.

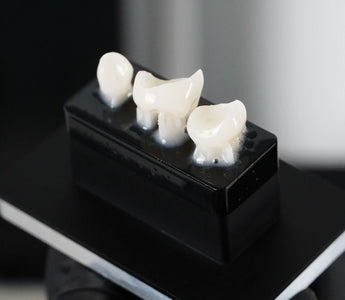
Step 7: Finishing
The final step in the process is finishing. If minimal supports are used, little finishing is necessary – only polishing of the areas where supports were needed. Some dental professionals, including Prof. Nulty, prefer to add additional finishing touches such as polishing and staining.
Prof. Nulty shared a few reasons for choosing Ackuretta as a part of his digital dental workflow.
“I would not downplay any other company. [...] But Ackuretta is more than just a printer. It’s more than just the open system. From when it first came, and it’s packed beautifully, it’s the little things; they pack an extra LCD screen. [...] Everything has been perfect. From the way it comes calibrated, it’s just awesome. And the way the resins have been expanded upon actively.”
IDDA
Prof. Nulty is a joint founder of the International Digital Dental Academy (IDDA), an organization that researches, educates, and supports dentists who have adopted a digital dental workflow. It is a valuable resource that allows dental professionals from all over the world to join the community and share their stories, ask questions, and provide support to one another. At its core, the IDDA is all about collaboration with everyone, everywhere. The success of the IDDA highlights the growing field of digital dentistry, and their ever-expanding networks make them an exciting partner. Their global presence as well as the courses, content and other connection opportunities make them a fantastic team to be a part of.